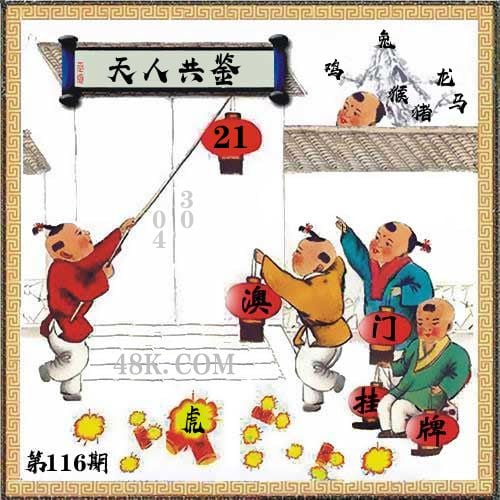
目录
- 第一节 - Angular 环境搭建
- 第二节 - 插值表达式
- 第三节 - 自定义组件
- 第四节 - 常用指令简介
- 第五节 - 事件绑定
- 第六节 - 表单模块简介
- 第七节 - Http 模块简介
- 第八节 - 注入服务
- 第九节 - 路由模块简介
第一节 - Angular 环境搭建
基础要求
Angular 开发环境
1
| $ npm install -g @angular/cli
|
1 2
| $ cd project-name $ ng serve
|
第二节 - 插值表达式
在 Angular 中,我们可以使用插值语法实现数据绑定。
绑定普通文本
1 2 3 4 5 6 7 8 9
| import { Component } from '@angular/core';
@Component({ selector: 'my-app', template: `<h1>Hello {{ name }}</h1>`, }) export class AppComponent { name = 'Angular'; }
|
绑定对象属性
1 2 3 4 5 6 7 8 9 10 11 12 13 14 15 16 17 18
| import { Component } from '@angular/core';
@Component({ selector: 'my-app', template: ` <h2>大家好,我是{{ name }}</h2> <p>我来自<strong>{{ address.province }}</strong>省, <strong>{{ address.city }}</strong>市 </p> `, }) export class AppComponent { name = 'Semlinker'; address = { province: '福建', city: '厦门' } }
|
在 Angular 内部为我们提供了 json
管道,它用来来显示对象信息:
1 2 3 4 5 6 7 8 9 10 11 12 13 14
| @Component({ selector: 'my-app', template: ` ... <p>{{address | json}}</p> `, }) export class AppComponent { name = 'Semlinker'; address = { province: '福建', city: '厦门' } }
|
第三节 - 自定义组件
在 Angular 中,我们可以通过 Component
装饰器和组件类来创建自定义组件。
基础知识
定义组件的元信息
在 Angular 中,我们可以使用 Component
装饰器来定义组件的元信息:
1 2 3 4
| @Component({ selector: 'my-app', template: `<h1>Hello {{name}}</h1>`, })
|
定义组件类
1 2 3
| export class AppComponent { name = 'Angular'; }
|
定义数据接口
在 TypeScript 中的接口是一个非常灵活的概念,除了可用于对类的一部分行为进行抽象外,也可用于对「对象的形状(Shape)」进行描述。
1 2 3 4 5 6 7 8 9
| interface Person { name: string; age: number; }
let semlinker: Person = { name: 'semlinker', age: 31 };
|
自定义组件示例
创建 UserComponent 组件
1 2 3 4 5 6 7 8 9 10 11 12 13 14 15 16 17 18
| import { Component } from '@angular/core';
@Component({ selector: 'sl-user', template: ` <h2>大家好,我是{{ name }}</h2> <p>我来自<strong>{{ address.province }}</strong>省, <strong>{{ address.city }}</strong>市 </p> ` }) export class UserComponent { name = 'Semlinker'; address = { province: '福建', city: '厦门' }; }
|
声明 UserComponent 组件
1 2 3 4 5 6 7 8
| import { UserComponent } from './user.component'; @NgModule({ imports: [ BrowserModule ], declarations: [ AppComponent, UserComponent], bootstrap: [ AppComponent ] }) export class AppModule { }
|
使用 UserComponent 组件
1 2 3 4 5 6 7 8 9
| import { Component } from '@angular/core';
@Component({ selector: 'my-app', template: ` <sl-user></sl-user> `, }) export class AppComponent {}
|
在构造函数中执行数据初始化
1 2 3 4 5 6 7 8 9 10 11 12 13
| @Component({...}) export class UserComponent { name: string; address: any;
constructor() { this.name = 'Semlinker'; this.address = { province: '福建', city: '厦门' } } }
|
接口使用示例
定义 Address 接口
1 2 3 4
| interface Address { province: string; city: string; }
|
使用 Address 接口
1 2 3 4 5
| export class UserComponent { name: string; address: Address; }
|
第四节 - 常用指令简介
在 Angular 实际项目中,最常用的指令是 ngIf
和 ngFor
指令。
基础知识
ngIf 指令简介
该指令用于根据表达式的值,动态控制模板内容的显示与隐藏。它与 AngularJS 1.x 中的 ng-if
指令的功能是等价的。
ngIf 指令语法
1
| <div *ngIf="condition">...</div>
|
ngFor 指令简介
该指令用于基于可迭代对象中的每一项创建相应的模板。它与 AngularJS 1.x 中的 ng-repeat
指令的功能是等价的。
ngFor 指令语法
1
| <li *ngFor="let item of items;">...</li>
|
ngIf 与 ngFor 指令使用示例
1 2 3 4 5 6 7 8 9 10 11 12 13 14 15 16 17 18 19 20 21 22 23 24 25 26 27 28 29 30 31 32 33 34 35 36 37 38 39 40
| import { Component } from '@angular/core';
interface Address { province: string; city: string; }
@Component({ selector: 'sl-user', template: ` <h2>大家好,我是{{name}}</h2> <p>我来自<strong>{{address.province}}</strong>省, <strong>{{address.city}}</strong>市 </p> <div *ngIf="showSkills"> <h3>我的技能</h3> <ul> <li *ngFor="let skill of skills"> {{skill}} </li> </ul> </div> ` }) export class UserComponent { name: string; address: Address; showSkills: boolean; skills: string[];
constructor() { this.name = 'Semlinker'; this.address = { province: '福建', city: '厦门' }; this.showSkills = true; this.skills = ['AngularJS 1.x', 'Angular 2.x', 'Angular 4.x', 'Angular 6.x']; } }
|
第五节 - 事件绑定
在 Angular 中,我们可以通过 (eventName)
的语法,实现事件绑定。
基础知识
事件绑定语法
1
| <date-picker (dateChanged)="statement()"></date-picker>
|
介绍完事件绑定的语法,接下来我们来为第五节中的 UserComponent
组件,开发一个功能,即可以让用户动态控制技能信息的显示与隐藏。
事件绑定示例
1 2 3 4 5 6 7 8 9 10 11 12 13 14 15 16
| @Component({ selector: 'sl-user', template: ` ... <button (click)="toggleSkills()"> {{ showSkills ? "隐藏技能" : "显示技能" }} </button> ... ` }) export class UserComponent { toggleSkills() { this.showSkills = !this.showSkills; } }
|
第六节 - 表单模块简介
Angular 中有两种表单:
- Template Driven Forms - 模板驱动式表单 (类似于 AngularJS 1.x 中的表单 )
- Reactive Forms - 响应式表单
本小节主要介绍模板驱动式的表单,接下来我们来演示如何通过表单来为我们的之前创建的 UserComponent
组件,增加让用户自定义技能的功能。
基础知识
导入表单模块
1 2 3 4 5 6 7 8
| import { FormsModule } from '@angular/forms';
@NgModule({ imports: [BrowserModule, FormsModule], declarations: [AppComponent, UserComponent], bootstrap: [AppComponent] }) export class AppModule { }
|
模板变量语法
1 2
| <video #player></video> <button (click)="player.pause()">Pause</button>
|
表单使用示例
1 2 3 4 5 6 7 8 9 10 11 12 13 14 15 16 17 18 19 20 21 22 23
| @Component({ selector: 'sl-user', template: ` ... <div *ngIf="showSkills"> <h3>我的技能</h3> ... <form (submit)="addSkill(skill.value)"> <label>添加技能</label> <input type="text" #skill> </form> </div> ` }) export class UserComponent { addSkill(skill: string) { let skillStr = skill.trim(); if (this.skills.indexOf(skillStr) === -1) { this.skills.push(skillStr); } } }
|
第七节 - Http 模块简介
基础知识
导入 HttpClientModule 模块
1 2 3 4 5 6 7 8 9
| import { HttpClientModule } from '@angular/common/http';
@NgModule({ imports: [BrowserModule, FormsModule, HttpModule], declarations: [AppComponent, UserComponent], bootstrap: [AppComponent] }) export class AppModule { }
|
使用 HttpClient 服务步骤
(1) 从 @angular/common/http
模块中导入 HttpClient;
(2) 使用构造注入,注入 http 服务;
(3) 调用 http 服务的 get()
方法,设置请求地址并发送 HTTP 请求;
(4) 把请求的结果,赋值给对应的属性。
HttpClient 服务使用示例
使用 HttpClient 服务
1 2 3 4 5 6 7 8 9 10 11 12 13 14 15 16 17 18 19 20 21 22 23 24 25 26 27 28 29 30 31 32 33 34 35 36
| import { Component, OnInit } from '@angular/core'; import { HttpClient } from '@angular/common/http';
interface Member { id: string; login: string; avatar_url: string; }
@Component({ selector: 'sl-members', template: ` <h3>Angular Orgs Members</h3> <ul *ngIf="members"> <li *ngFor="let member of members;"> <p> <img [src]="member.avatar_url" width="48" height="48"/> ID:<span>{{member.id}}</span> Name: <span>{{member.login}}</span> </p> </li> </ul> ` }) export class MembersComponent implements OnInit { members: Member[];
constructor(private http: HttpClient) { }
ngOnInit() { this.http.get<Member[]>(`https://api.github.com/orgs/angular/members? page=1&per_page=5`) .subscribe(data => { if (data) this.members = data; }); } }
|
声明 MembersComponent 组件
1 2 3 4 5 6 7 8 9
| import { MembersComponent } from './members.component';
@NgModule({ imports: [BrowserModule, FormsModule, HttpClientModule], declarations: [AppComponent, UserComponent, MembersComponent], bootstrap: [AppComponent] }) export class AppModule { }
|
使用 MembersComponent 组件
1 2 3 4 5 6 7 8 9
| import { Component } from '@angular/core';
@Component({ selector: 'my-app', template: ` <sl-members></sl-members> `, }) export class AppComponent {}
|
第八节 - 注入服务
基础知识
组件中注入服务步骤
(1) 创建服务,如:
1 2 3 4
| @Injectable({ providedIn: 'root' }) export class MemberService {}
|
(2) 在应用的地方,导入已创建的服务,如:
1
| import { MemberService } from '../member.service';
|
(3) 使用构造注入方式,注入服务:
1 2 3 4
| export class MembersComponent implements OnInit { constructor(private memberService: MemberService) { } }
|
服务使用示例
创建 MemberService 服务
1 2 3 4 5 6 7 8 9 10 11 12 13 14 15 16 17
| import { Injectable } from '@angular/core'; import { HttpClient } from '@angular/common/http'; import { Observable }from 'rxjs';
import { Member } from './members.component'
@Injectable({ providedIn: 'root' }) export class MemberService { constructor(private http: HttpClient) { }
getMembers(): Observable<Member[]>{ return this.http .get<Member[]>(`https://api.github.com/orgs/angular/members?page=1&per_page=5`) } }
|
使用 MemberService 服务
1 2 3 4 5 6 7 8 9 10 11 12 13 14 15 16
| import { MemberService } from "./member.service";
@Component({...}) export class MembersComponent implements OnInit { members: Member[];
constructor(private memberService: MemberService) { }
ngOnInit() { this.memberService.getMembers() .subscribe(members => { if (members) this.members = members; }); } }
|
第九节 - 路由模块简介
基础知识
导入路由模块
1 2 3 4 5 6 7 8 9
| import { RouterModule } from '@angular/router';
@NgModule({ imports: [BrowserModule, FormsModule, HttpClientModule, RouterModule], declarations: [AppComponent, UserComponent, MembersComponent], bootstrap: [AppComponent] }) export class AppModule { }
|
配置路由信息
1 2 3 4 5 6 7 8 9 10 11 12 13 14 15
| import { Routes, RouterModule } from '@angular/router'; import { UserComponent } from './user.component';
export const ROUTES: Routes = [ { path: 'user', component: UserComponent } ];
@NgModule({ imports: [ BrowserModule, RouterModule.forRoot(ROUTES) ], }) export class AppModule {}
|
routerLink 指令
为了让我们链接到已设置的路由,我们需要使用 routerLink 指令,具体示例如下:
1 2 3 4
| <nav> <a routerLink="/">首页</a> <a routerLink="/user">我的</a> </nav>
|
当我们点击以上的任意链接时,页面不会被重新加载。反之,我们的路径将在 URL 地址栏中显示,随后进行后续视图更新,以匹配 routerLink
中设置的值。
router-outlet 指令
该指令用于告诉 Angular 在哪里加载组件,当 Angular 路由匹配到响应路径,并成功找到需要加载的组件时,它将动态创建对应的组件,并将其作为兄弟元素,插入到 router-outlet
元素中。具体示例如下:
1 2 3 4 5 6 7 8 9 10
| @Component({ selector: 'my-app', template: ` <div class="app"> <h3>Our app</h3> <router-outlet></router-outlet> </div> ` }) export class AppComponent {}
|
路由使用示例
配置路由信息
1 2 3 4 5 6 7 8 9 10 11 12
| export const ROUTES: Routes = [ { path: '', pathMatch: 'full', redirectTo: 'user' }, { path: 'user', component: UserComponent }, { path: 'members', component: MembersComponent } ];
@NgModule({ imports: [BrowserModule, FormsModule, HttpClientModule, RouterModule.forRoot(ROUTES)], }) export class AppModule { }
|
配置路由导航
1 2 3 4 5 6 7 8 9 10 11 12 13 14 15 16 17 18 19 20 21 22 23
| import { Component } from '@angular/core';
@Component({ selector: 'my-app', template: ` <div class="app"> <h1>欢迎来到 {{name}} 的世界</h1> <nav> <a routerLink="/user">我的信息</a> <a routerLink="/members">Angular成员</a> </nav> <router-outlet></router-outlet> </div> `, styles: [` a { margin: 5px; } `] }) export class AppComponent { name = 'Angular'; }
|
欢迎小伙伴们订阅全栈修仙之路,及时阅读 TypeScript、Node/Deno、Angular 技术栈最新文章。