


澳门六合彩【挂牌】 更多»
|
110期 | |
|---|---|---|
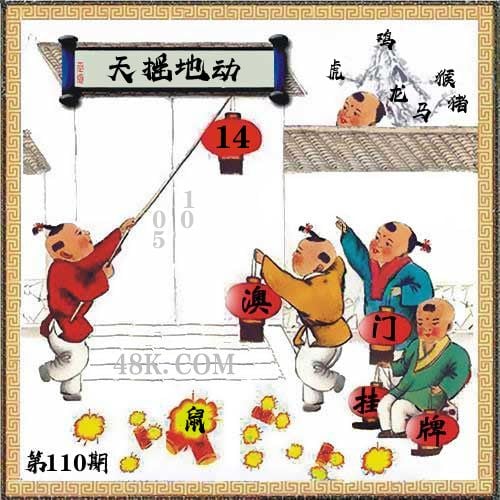
| 挂牌 | 14 | |
| 火烧 | 鼠 | |
| 横批 | 天摇地动 | |
| 门数 | 05,01 | |
| 六肖 | 鸡虎猴龙猪马 | |
澳门挂牌解析
2024-110期正版彩图挂:14;挂牌:天摇地动;六肖:鸡虎猴龙猪马;火烧:鼠
解析:【出自】:清 钱采《说岳全传》第43回:“这场大战,真个是天摇地动,日色无光。”【示例】:刚一迷糊眼儿,半天空里咕隆隆地一声响,从西半天响到东半天,震得天摇地动。(梁斌《播火记》二四)
解释:仿佛天快要塌下来;地将要陷下去似的。形容声势或威力强大的变化。
综合取肖:马虎羊蛇猴鸡
解析:【出自】:清 钱采《说岳全传》第43回:“这场大战,真个是天摇地动,日色无光。”【示例】:刚一迷糊眼儿,半天空里咕隆隆地一声响,从西半天响到东半天,震得天摇地动。(梁斌《播火记》二四)
解释:仿佛天快要塌下来;地将要陷下去似的。形容声势或威力强大的变化。
综合取肖:马虎羊蛇猴鸡
【正版澳彩图库】 更多»
澳门管家婆09042.com
『成语平特』
111期
成语爆平特
【龙行天下】
开
¥00
准
109期
成语爆平特
【狗仗人势】
开
狗43
准
107期
成语爆平特
【狡兔三窟】
开
兔26
准
105期
成语爆平特
【龙行天下】
开
龙49
准
099期
成语爆平特
【钻牛角尖】
开
牛28
准
澳门管家婆09042.com
『欲钱解特』
111期:
欲钱解特诗
开:¥00
《鸡蛇牛兔发大财,本期特码出大数》
110期:
欲钱解特诗
开:蛇48
《虎羊马鼠发大财,本期特码出大数》
109期:
欲钱解特诗
开:狗43
《蛇虎猴马发大财,本期特码出大数》
108期:
欲钱解特诗
开:羊46
《马鼠牛鸡发大财,本期特码出大数》
107期:
欲钱解特诗
开:羊46
《蛇虎羊猴发大财,本期特码出大数》
澳彩图库心水图片资料专区
澳彩独家高手出版精料
澳彩综合全年资料大全
澳彩资料独家精准四肖
| 111期: ⑨肖 | 羊兔龙马蛇猴猪牛狗 | ????中 |
| 111期: ⑧肖 | 羊兔龙马蛇猴猪牛 | ????中 |
| 111期: ⑦肖 | 羊兔龙马蛇猴猪 | ????中 |
| 111期: ⑥肖 | 羊兔龙马蛇猴 | ????中 |
| 111期: ⑤肖 | 羊兔龙马蛇 | ????中 |
| 111期: ④肖 | 羊兔龙马 | ????中 |
| 110期--长期跟踪,稳赚不赔! | ||
| 110期: ⑨肖 | 羊牛猴猪鼠虎蛇龙鸡 | 蛇48中 |
| 110期: ⑧肖 | 羊牛猴猪鼠虎蛇龙 | 蛇48中 |
| 110期: ⑦肖 | 羊牛猴猪鼠虎蛇 | 蛇48中 |
| 110期: ⑥肖 | 羊牛猴猪鼠虎 | 蛇48中 |
| 110期: ⑤肖 | 羊牛猴猪鼠 | 蛇48中 |
| 110期: ④肖 | 羊牛猴猪 | 蛇48中 |
| 109期--长期跟踪,稳赚不赔! | ||
| 109期: ⑨肖 | 猪鼠猴羊虎龙鸡牛狗 | 狗43中 |
| 109期: ⑧肖 | 猪鼠猴羊虎龙鸡牛 | 狗43中 |
| 109期: ⑦肖 | 猪鼠猴羊虎龙鸡 | 狗43中 |
| 109期: ⑥肖 | 猪鼠猴羊虎龙 | 狗43中 |
| 109期: ⑤肖 | 猪鼠猴羊虎 | 狗43中 |
| 109期: ④肖 | 猪鼠猴羊 | 狗43中 |